With How to Deep Clean the Rubber Seals on Doors and Windows at the forefront, this guide opens a window to an essential aspect of home maintenance, inviting you to embark on a journey of discovery. We will explore why these often-overlooked components are crucial for your home’s comfort and efficiency, delving into the common issues that arise from neglect and the surprising benefits of keeping them pristine.
Understanding the materials and methods involved in cleaning these seals is key to a successful outcome. From identifying different seal types to gathering the right supplies, this comprehensive approach ensures you have all the knowledge needed to tackle dirt, mold, and wear effectively. We will guide you through step-by-step procedures, including advanced techniques for challenging situations, and offer practical advice for ongoing care and protection.
Understanding the Importance of Clean Door and Window Seals
Maintaining the integrity of your home’s seals is a fundamental aspect of effective property upkeep. These often-overlooked components play a critical role in ensuring comfort, security, and the overall health of your living environment. By understanding their function and the consequences of neglect, you can better appreciate the necessity of regular cleaning and maintenance.Door and window seals, also known as weatherstripping, are designed to create a barrier between the interior and exterior of your home.
They are crucial for preventing the unwanted passage of air, water, and even pests. When these seals are clean and in good condition, they contribute significantly to a well-maintained and efficient home.
The Role of Door and Window Seals in Home Maintenance
Door and window seals are essential for creating a tight seal that prevents drafts and moisture infiltration. They act as the first line of defense against the elements, ensuring that your home remains protected from external environmental factors. Their proper functioning is directly linked to the longevity and structural soundness of your property.
Common Issues Caused by Dirty or Degraded Seals
When door and window seals become dirty, brittle, or torn, a host of problems can arise. These issues can range from minor inconvenconveniences to significant structural damage. Understanding these potential problems highlights the importance of proactive maintenance.A buildup of dirt, grime, and mildew on seals can compromise their flexibility and sealing capabilities. This can lead to:
- Increased drafts, making rooms feel colder in winter and warmer in summer.
- Higher energy bills as heating and cooling systems work harder to compensate for air leakage.
- The ingress of moisture, which can lead to mold and mildew growth within wall cavities and around window frames.
- Pest infestations, as gaps can provide entry points for insects and rodents.
- Reduced sound insulation, leading to more external noise entering the home.
- Premature wear and tear on door and window frames due to constant exposure to moisture.
Benefits of Maintaining Clean Seals for Energy Efficiency
Clean and well-maintained seals are a cornerstone of energy efficiency in any home. By ensuring a tight seal, you significantly reduce uncontrolled air exchange between the inside and outside of your house. This directly translates into tangible savings and a more comfortable living space.
A well-sealed home can reduce energy loss by up to 30%.
The benefits include:
- Reduced heating and cooling costs: Less conditioned air escapes, and less unconditioned air enters, meaning your HVAC system operates less frequently and at lower intensity.
- Improved indoor comfort: Eliminating drafts creates a more consistent and pleasant temperature throughout your home, eliminating cold spots.
- Lower carbon footprint: By consuming less energy, you contribute to a reduction in greenhouse gas emissions.
- Extended lifespan of HVAC systems: When systems don’t have to work as hard, they tend to last longer, reducing replacement costs.
Contribution of Clean Seals to Preventing Water Damage
Water damage is one of the most costly and destructive issues a homeowner can face. Door and window seals are a critical barrier in preventing water from entering your home, especially during heavy rain or snow events. Keeping them clean and intact is a proactive measure against such damage.When seals are compromised by dirt, debris, or degradation, water can find its way into the very structure of your home.
This can manifest in several ways:
- Water stains on interior walls and ceilings around windows and doors.
- Rotting of window frames and door jambs, particularly in wooden structures.
- Damage to insulation within wall cavities, reducing its effectiveness and potentially leading to mold growth.
- The development of mold and mildew, which can pose significant health risks and require extensive remediation.
- Damage to flooring and furnishings if water seeps through to lower levels.
Properly functioning seals ensure that rainwater and melting snow are effectively channeled away from the building’s interior, protecting your investment and maintaining a healthy living environment.
Identifying Types of Door and Window Seals
Understanding the different types of seals present on your doors and windows is a crucial first step in effective deep cleaning. Each material and profile requires specific care to ensure longevity and optimal performance. By recognizing what you’re dealing with, you can select the most appropriate cleaning agents and techniques, preventing potential damage and achieving the best results.The variety of seals found in homes reflects different manufacturing processes, material advancements, and design considerations aimed at providing insulation, weatherproofing, and sound dampening.
Identifying these components allows for a tailored approach to cleaning, ensuring that the chosen methods are both effective and gentle on the materials.
Common Seal Materials
The materials used for door and window seals are chosen for their durability, flexibility, and resistance to environmental factors. Recognizing these materials will guide your choice of cleaning solutions.
- Rubber: A very common and versatile material, often EPDM (ethylene propylene diene monomer). It is known for its excellent elasticity, resistance to weathering, ozone, and UV radiation. However, some harsh chemicals, like strong solvents or petroleum-based cleaners, can degrade rubber over time, causing it to become brittle or sticky.
- Silicone: Highly resistant to extreme temperatures, UV light, and moisture. Silicone seals are very durable and can last for many years. They are generally compatible with mild soaps and water, but strong acids or bases can potentially damage their surface.
- Vinyl (PVC): Often used in uPVC window and door systems. Vinyl is rigid yet flexible, offering good insulation and weather resistance. It can be sensitive to abrasive cleaners or solvents that might dull its finish or cause discoloration.
Seal Material Reactivity to Cleaning Agents
Each seal material possesses unique properties that dictate its interaction with various cleaning agents. Understanding these reactions is key to avoiding damage and ensuring the seals remain functional and aesthetically pleasing.
- Rubber: While generally robust, rubber seals can be susceptible to drying out and cracking if exposed to petroleum-based products or harsh degreasers. Mild soap and water are usually sufficient, but for tougher grime, specialized rubber cleaners can be used. Avoid abrasive scrubbing pads that can scratch the surface.
- Silicone: Silicone is quite resilient. For routine cleaning, a simple solution of warm water and a mild dish soap is effective. For stubborn mold or mildew, a diluted bleach solution (1 part bleach to 10 parts water) can be used cautiously, followed by thorough rinsing. However, prolonged exposure to strong solvents should be avoided.
- Vinyl (PVC): Vinyl is relatively easy to clean with a damp cloth and mild detergent. For more stubborn stains, a non-abrasive all-purpose cleaner can be employed. It’s important to steer clear of acetone or strong solvents, which can soften or damage the vinyl’s surface.
Visual Description of Different Seal Profiles
The shape, or profile, of a seal plays a significant role in its function and how it interacts with its frame. Different profiles are designed to create specific types of barriers against air, water, and sound.
- Bulb Seals: These seals feature a hollow, bulb-like projection. When the door or window is closed, the bulb compresses, creating a tight seal. They are often found on older metal storm doors or some cabinet seals. Their flexibility makes them effective for irregular gaps.
- Fin Seals (or Wiper Seals): Characterized by one or more thin, flexible “fins” that press against the mating surface. These fins help to wipe away moisture and debris as the door or window is operated, providing a good barrier against drafts and water ingress. They are common on sliding windows and doors.
- Tubular Seals: These seals have a hollow, tube-like structure, often round or oval in cross-section. They provide cushioning and a good seal by compressing when the door or window is closed. They are frequently used in automotive applications but can also be found on some exterior doors and windows.
Gathering Necessary Cleaning Supplies

To effectively deep clean your door and window rubber seals, having the right tools and cleaning solutions is paramount. This section will guide you through assembling a comprehensive cleaning kit, highlighting the properties of suitable cleaning agents, and warning against common household items that could damage the rubber. A well-prepared approach ensures a thorough clean without compromising the integrity of your seals.
Essential Cleaning Tools and Supplies
A successful deep clean relies on having the appropriate equipment at hand. These items are designed to reach into crevices, gently lift dirt, and ensure a comprehensive cleaning process.
- Microfiber cloths: These are ideal for wiping and polishing without scratching the rubber surface. Their absorbency also helps in drying.
- Soft-bristled brush: A toothbrush or a dedicated cleaning brush with soft bristles can effectively dislodge dirt and grime from textured seals.
- Cotton swabs or Q-tips: Perfect for reaching into tight corners and detailed areas of the seals that larger tools cannot access.
- Spray bottle: Useful for applying cleaning solutions evenly and controlling the amount used.
- Bucket: For mixing cleaning solutions or rinsing cloths.
- Gloves: To protect your hands from cleaning solutions.
Recommended Cleaning Solutions for Rubber Seals
The choice of cleaning solution is critical for effective cleaning and the preservation of rubber. Gentle yet effective solutions will break down grime without causing degradation.
- Mild dish soap and water: A mixture of a few drops of mild dish soap in warm water is a safe and effective general-purpose cleaner for rubber seals. It breaks down grease and dirt without being overly harsh.
- White vinegar and water solution: A 1:1 ratio of white vinegar and water is an excellent natural disinfectant and degreaser. Vinegar’s acidity helps to break down mineral deposits and mold.
- Specialized rubber cleaner: For more stubborn stains or heavily soiled seals, a commercially available rubber cleaner can be highly effective. Always ensure it is formulated for automotive or household rubber seals.
The key to a successful rubber seal clean is to use solutions that are effective against dirt and grime but gentle on the rubber material itself.
Household Items Detrimental to Rubber Seals
While it might be tempting to use readily available household cleaners, some can cause irreversible damage to rubber seals. Understanding these potential hazards is crucial to prevent costly repairs or replacements.
- Harsh chemicals: Products containing strong acids, alkalis, or solvents, such as bleach, ammonia, or strong degreasers, can dry out, crack, or even dissolve rubber.
- Abrasive cleaners: Scouring powders or abrasive pads can scratch and wear down the rubber surface, compromising its sealing ability and aesthetic.
- Petroleum-based products: Items like WD-40 or other oil-based lubricants, while useful for some tasks, can degrade rubber over time by breaking down its molecular structure.
- High-pressure water jets: While effective for general cleaning, directing high-pressure water directly at seals can force water into unwanted areas or damage the seal’s flexibility.
Step-by-Step Deep Cleaning Procedures

Deep cleaning your door and window seals is a straightforward process that, when followed systematically, can significantly improve their performance and longevity. This section will guide you through the essential steps for both doors and windows, ensuring no area is overlooked and that stubborn grime is effectively removed.The following procedures are designed to be comprehensive, covering everything from initial preparation to the final drying stages.
We will address techniques for tackling those hard-to-reach spots and provide effective methods for dealing with persistent dirt, mold, and mildew.
Door Seal Cleaning Procedure
Cleaning door seals involves a methodical approach to ensure all accumulated dirt, debris, and potential mold or mildew are eradicated. This process will help maintain the seal’s integrity, preventing drafts and improving energy efficiency.
- Preparation: Begin by opening the door fully to gain complete access to the entire seal. Remove any loose debris, such as cobwebs or large particles, by hand or with a soft brush.
- Initial Wipe Down: Dampen a clean microfiber cloth with a mild soap and water solution. Gently wipe down the entire length of the door seal, paying attention to the edges and crevices.
- Stubborn Dirt and Mildew Treatment: For areas with tougher grime, mold, or mildew, prepare a solution of equal parts white vinegar and water. Apply this solution directly to the affected areas using a spray bottle or by dabbing with a cloth. Let it sit for 5-10 minutes to allow the vinegar to break down the contaminants.
- Scrubbing: Use a soft-bristled brush (an old toothbrush works well for tight spots) to gently scrub the treated areas. Work the solution into the seal to lift embedded dirt and mildew.
- Rinsing: Wipe down the seals with a clean cloth dampened with plain water to remove any remaining cleaning solution and loosened debris. Ensure all traces of soap or vinegar are gone.
- Drying: Thoroughly dry the seals with a clean, dry microfiber cloth. It is crucial to ensure the seals are completely dry to prevent the regrowth of mold and mildew.
Window Seal Cleaning Procedure
Window seals, while similar in material to door seals, often present different challenges due to their placement and the types of debris they accumulate. The following steps are tailored for effective window seal cleaning.
- Preparation: Open the window to its maximum extent or remove it from its frame if possible for better access. Clear away any loose debris from the frame and the seal itself.
- Gentle Cleaning: Mix a mild dish soap with warm water. Dip a soft cloth into the solution and wring it out well. Gently wipe the entire window seal, focusing on removing dust and surface grime.
- Addressing Mold and Grime: For more persistent issues like mold, mildew, or accumulated grime, a solution of 1 part bleach to 10 parts water can be effective. Alternatively, the vinegar and water solution mentioned for door seals can also be used. Apply the chosen solution to the affected areas.
- Detailed Scrubbing: Utilize a small, soft brush, such as a toothbrush, to meticulously clean along the entire seal, especially in corners and where the seal meets the glass and frame. This ensures thorough removal of embedded contaminants.
- Rinsing Thoroughly: Use a separate clean cloth, dampened with fresh water, to wipe down the seals and remove all traces of the cleaning solution. Repeat this step as necessary to ensure no residue remains.
- Complete Drying: Pat the seals dry with a clean, absorbent microfiber cloth. Ensure no moisture is left behind, as dampness can encourage mold and mildew development.
Techniques for Reaching Difficult-to-Access Areas
Reaching every part of door and window seals can be challenging, especially in intricate frames or when seals are deeply recessed. Employing specific tools and techniques can ensure a thorough clean.
- Extended Reach Tools: For deep window tracks or the bottom seals of some doors, consider using tools with longer handles or flexible heads. Long-handled cotton swabs or specialized cleaning brushes designed for narrow spaces can be invaluable.
- Angled Brushes: Brushes with angled bristles or flexible heads can navigate corners and curves more effectively than straight brushes.
- Damp Cloths on Sticks: Wrap a damp cleaning cloth around the end of a ruler or a flat stick and secure it with a rubber band. This allows you to push the cloth into narrow gaps and crevices.
- Dental Picks (with caution): For very stubborn, dried-on debris in tight corners, a plastic dental pick can be used very carefully. Ensure you do not scratch or damage the seal material.
Methods for Removing Stubborn Dirt, Mold, and Mildew
When standard cleaning solutions are insufficient, more potent methods are required to tackle ingrained dirt, mold, and mildew. The key is to use effective agents while preserving the integrity of the seal material.
- Vinegar Solution: As previously mentioned, a 1:1 solution of white vinegar and water is an excellent natural disinfectant and cleaner for mold and mildew. Its acidity helps break down organic matter.
- Baking Soda Paste: For tougher stains and grime, a paste made from baking soda and water can be applied. Let it sit for a few minutes before gently scrubbing. Baking soda is a mild abrasive that can lift dirt without damaging the surface.
- Hydrogen Peroxide (3% solution): For stubborn mold and mildew, a 3% hydrogen peroxide solution can be effective. Apply it to the affected area, let it bubble for a few minutes, then wipe and rinse. Always test in an inconspicuous area first.
- Commercial Mold and Mildew Removers: If natural solutions are not sufficient, consider using a commercial cleaner specifically designed for mold and mildew removal on rubber or vinyl. Always follow the manufacturer’s instructions and ensure good ventilation.
- Important Note: When dealing with mold, always wear gloves and consider wearing a mask to avoid inhaling spores. Ensure adequate ventilation during the cleaning process.
When tackling mold and mildew, prioritize safety and ventilation. Always test cleaning solutions on a small, inconspicuous area first to ensure they do not discolor or damage the seal material.
Rinsing and Drying the Seals Thoroughly
The final stages of rinsing and drying are critical for the long-term effectiveness of your cleaning efforts. Inadequate rinsing can leave behind residue that attracts dirt, while insufficient drying can lead to renewed mold and mildew growth.
- Rinsing Technique: Use a clean, damp cloth to wipe down all cleaned areas multiple times. The goal is to remove every trace of cleaning solution. For window seals, you might find it effective to use a spray bottle filled with clean water to mist the seals, then wipe them dry. For door seals, a well-wrung-out cloth is usually sufficient.
- Drying Process: A clean, dry microfiber cloth is the best tool for drying seals. Microfiber is highly absorbent and gentle. Ensure you press the cloth firmly against the seal to absorb as much moisture as possible.
- Air Circulation: After wiping down, leave doors and windows open for a period to allow for natural air circulation. This helps to evaporate any remaining moisture in hard-to-reach crevices. If humidity is high, a fan can be used to speed up the drying process.
- Checking for Dampness: Run your fingers along the entire length of the seal to feel for any remaining dampness. Pay special attention to folds and corners where moisture can linger.
Advanced Cleaning Techniques and Problem Areas
While the general cleaning steps are effective for routine maintenance, certain situations demand more targeted approaches. This section delves into advanced techniques for tackling stubborn issues and specific challenges that may arise with door and window seals. Addressing these problem areas thoroughly ensures the longevity and optimal performance of your seals.Tackling persistent issues like black mold and ingrained stains requires a slightly more robust approach than simple wiping.
Similarly, seals with complex textures or those in environments prone to high moisture necessitate specialized methods to achieve a truly deep clean and prevent future problems.
Black Mold and Persistent Stains
Black mold and stubborn stains can be unsightly and, in some cases, indicative of underlying moisture issues. Effective removal requires careful application of appropriate cleaning agents.
- Vinegar Solution: A 50/50 solution of white vinegar and water is a natural and effective disinfectant for mold. Apply it to the affected area using a spray bottle or a cloth, let it sit for about 10-15 minutes, and then scrub gently with a soft brush. Rinse thoroughly with clean water.
- Baking Soda Paste: For tougher stains, a paste made from baking soda and water can be very effective. Apply the paste to the stain, let it sit for 15-20 minutes, then scrub with a soft brush. The mild abrasive quality of baking soda helps lift the stain without damaging the rubber.
- Hydrogen Peroxide: A 3% hydrogen peroxide solution can be used to tackle mold and mildew. Apply it directly to the affected area, let it bubble for a few minutes, and then wipe clean. Ensure good ventilation when using hydrogen peroxide.
- Commercial Mold Removers: For extremely stubborn mold or stains, consider using a commercial mold and mildew remover specifically designed for rubber or vinyl. Always follow the product instructions carefully and test in an inconspicuous area first.
When dealing with mold, prioritize ventilation and wear gloves and a mask to protect yourself from spores.
Cleaning Intricate Designs and Textures
Seals with detailed patterns or textured surfaces can trap dirt and grime more easily, making them challenging to clean. These areas require tools that can reach into crevices effectively.
- Detail Brushes: A set of small detail brushes, such as old toothbrushes or specialized detailing brushes used for cars or electronics, are invaluable for cleaning intricate designs. Their fine bristles can reach into grooves and patterns that larger brushes cannot.
- Cotton Swabs: For very fine details or tight corners, cotton swabs (Q-tips) can be used. Dip them in your chosen cleaning solution and carefully work them over the textured surfaces.
- Compressed Air: After cleaning, compressed air can be useful for blowing away any loose debris or cleaning solution residue from intricate patterns, ensuring a thorough dry.
High-Moisture Areas (Bathrooms and Kitchens)
Bathrooms and kitchens are particularly prone to moisture, which can accelerate the growth of mold and mildew on seals. Extra vigilance and specific cleaning strategies are necessary in these environments.
- Frequent Cleaning: Regular, even daily, wiping down of seals in these areas with a dry cloth can prevent moisture from accumulating and setting in.
- Natural Disinfectants: Regularly use the vinegar or hydrogen peroxide solutions mentioned earlier to disinfect seals and prevent mold growth. A light spray and wipe-down after showering or cooking can make a significant difference.
- Adequate Ventilation: Ensure that bathrooms have proper ventilation (e.g., exhaust fans) and that kitchen areas are well-ventilated during and after cooking. This is crucial for drying out seals and preventing moisture buildup.
- Silicone Sealant Inspection: In areas with persistent moisture issues, periodically inspect the integrity of the silicone sealant around windows and doors. If it is cracked or degraded, it may need to be replaced to prevent water ingress.
Proactive and frequent maintenance is key to preventing major issues in high-moisture environments.
Maintaining and Protecting Clean Seals
Once you’ve invested the time and effort into deep cleaning your door and window seals, it’s crucial to establish a routine for maintenance and protection. Regular upkeep not only preserves the aesthetic appeal of your home but, more importantly, extends the lifespan of these vital components, ensuring they continue to perform their essential functions effectively. Neglecting maintenance can lead to premature wear and tear, ultimately costing you more in repairs or replacements down the line.Proactive measures are key to keeping your seals in optimal condition and preventing the accumulation of debris that can compromise their integrity.
By implementing a few simple practices, you can significantly enhance their durability and performance, contributing to a more comfortable and energy-efficient living environment.
Regular Maintenance for Seal Longevity
Consistent attention to your door and window seals is paramount for their sustained effectiveness and longevity. A well-maintained seal acts as a superior barrier against the elements, preventing drafts, moisture intrusion, and pest entry. This regular care regimen directly contributes to energy savings by maintaining a tighter seal and reducing the workload on your heating and cooling systems. Furthermore, it helps to prevent costly damage to your home’s structure, such as rot or mold, which can arise from persistent moisture ingress.
Preventative Measures for Clean Seals
Implementing preventative strategies significantly reduces the frequency and intensity of deep cleaning required. These measures focus on minimizing the exposure of seals to dirt, grime, and other contaminants that can lead to degradation over time.
- Regular Wiping: Incorporate a quick wipe-down of the seals with a damp cloth as part of your routine window and door cleaning. This simple act removes surface dust and cobwebs before they can embed themselves.
- Gutter and Drainage Checks: Ensure that gutters and drainage systems around windows and doors are clear. Clogged gutters can cause water to overflow and pool near seals, leading to premature aging and potential damage.
- Landscaping Considerations: Trim back plants and bushes that are in direct contact with door and window frames. Overhanging foliage can shed debris and moisture directly onto the seals.
- Door Sweep Maintenance: For doors, ensure that door sweeps are functioning correctly and are free of debris. A well-adjusted door sweep prevents dirt and water from being tracked onto the seal.
- Window Treatment Management: Be mindful of how window treatments, such as blinds and curtains, interact with the seals. Ensure they do not rub against or trap moisture on the seals.
Recommendations for Seal Protection and Conditioning
To further enhance the resilience and flexibility of your rubber seals, consider using specific products designed for their protection and conditioning. These products can help to restore elasticity, prevent drying and cracking, and offer an additional layer of defense against environmental factors.
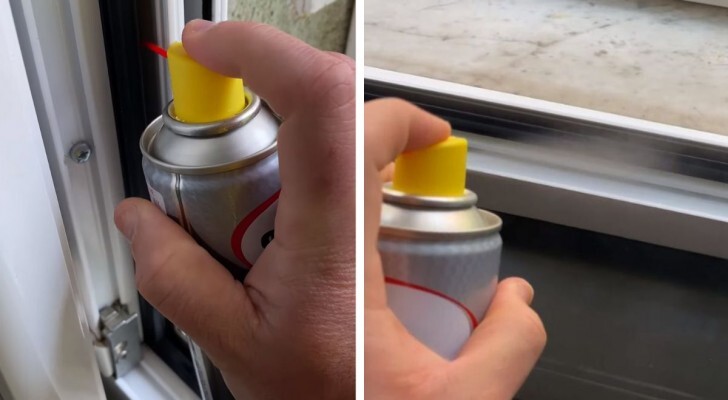
- Silicone-Based Protectants: These are highly recommended for rubber seals. They create a protective barrier that repels water and dirt, and crucially, they prevent the rubber from drying out and becoming brittle. Apply sparingly using a clean cloth.
- Rubber Conditioners: Similar to silicone-based products, rubber conditioners are formulated to nourish and restore the natural properties of rubber, keeping it supple and less prone to cracking.
- Avoid Petroleum-Based Products: It is important to note that petroleum-based products, such as WD-40 or Vaseline, should be avoided. These can degrade rubber over time, making it sticky and causing it to break down faster.
“The best defense is a good offense when it comes to maintaining rubber seals; proactive conditioning prevents reactive repair.”
Identifying Early Signs of Seal Degradation
Being vigilant in observing your seals can help you catch potential problems before they escalate. Early detection allows for timely intervention, often saving you from more extensive repairs.
- Visible Cracks or Tears: Inspect the seals for any small cracks, splits, or tears. These are often the first indicators that the rubber is losing its elasticity.
- Brittleness or Stiffness: Gently press on the seal. If it feels hard, brittle, or lacks its usual flexibility, it may be degrading.
- Loss of Adhesion: Check if the seal is pulling away from the frame or window pane. This indicates a loss of its bonding properties.
- Increased Drafts: A noticeable increase in drafts around closed doors or windows is a strong sign that the seals are no longer effectively blocking air flow.
- Water or Moisture Intrusion: Observe for any signs of water or moisture seeping into the home around the seals, especially after rain. This suggests the seal’s barrier function is compromised.
- Discoloration or Gummy Texture: While some discoloration can be from dirt, a significant change in color, or a gummy, sticky texture, can indicate chemical breakdown.
Visualizing the Cleaning Process (Descriptive)

Witnessing the transformation of your door and window seals from a state of neglect to pristine cleanliness is a highly satisfying aspect of this deep cleaning process. It’s a journey from the dull and grimy to the bright and functional, offering a clear visual testament to the effectiveness of your efforts.This section will guide you through the visual cues that indicate the need for cleaning, describe the satisfying visual changes that occur during the cleaning process, and finally, paint a picture of what perfectly clean and revitalized seals look like, highlighting their renewed appearance and improved functionality.
The Appearance of Dirty Door and Window Seals
Before embarking on the deep cleaning journey, dirty door and window seals often present a rather unappealing visual. They can appear discolored, with a dull, grayish, or even brownish hue, a stark contrast to their original color. This discoloration is typically due to accumulated grime, mildew, and environmental pollutants that adhere to the porous rubber or silicone material over time.
You might observe a sticky or greasy film on the surface, particularly in areas exposed to kitchen grease or outdoor elements. In more severe cases, black or dark spots of mold and mildew can mar the surface, creating an unsightly appearance and potentially compromising the seal’s integrity. The texture might feel rough or slightly brittle, a sign that the material is no longer supple and flexible.
The Cleaning Process in Action: A Visual Transformation
As you begin to apply your chosen cleaning solution and gently scrub the seals, a remarkable visual transformation unfolds. Initially, the dirt and grime might seem stubborn, but with consistent effort, you’ll start to see the dullness recede. The cleaning agent works to lift and dissolve the accumulated residue, revealing the original color of the seal underneath. Imagine watching a muddy canvas gradually being wiped clean, exposing the vibrant pigments beneath.
You’ll see the dark spots of mildew begin to fade and disappear as they are lifted from the material. The sticky film will dissolve, leaving a smooth, clean surface. The scrubbing action, whether with a soft brush or cloth, helps to agitate the cleaner, further loosening and removing embedded dirt. As you rinse or wipe away the cleaning solution, the seals will begin to gleam, their texture becoming visibly smoother and more uniform.
The Look of Perfectly Clean and Revitalized Seals
Once the deep cleaning process is complete and the seals have been thoroughly dried, they will present a dramatically different appearance. Perfectly clean door and window seals will exhibit their original, vibrant color, whether it’s a crisp white, a deep black, or a neutral gray. The surface will be smooth and free from any discoloration, mold, or mildew spots. You will notice a slight sheen, indicating that the material is no longer coated in dirt and grime.
The seals will appear supple and flexible, suggesting that their elasticity has been restored, which is crucial for effective insulation and preventing drafts. They will look uniformly colored and free of any unsightly blemishes, contributing to a cleaner, more polished aesthetic for your doors and windows. The overall impression is one of renewed functionality and a significant enhancement to the visual appeal of your home.
Final Review

By following these detailed steps and embracing the maintenance tips provided, you’ll not only achieve perfectly clean and revitalized door and window seals but also ensure their longevity and optimal performance. This process is more than just cleaning; it’s an investment in your home’s energy efficiency, protection against water damage, and overall well-being. Enjoy the satisfaction of a well-maintained home, where every detail, down to the seals on your doors and windows, contributes to a comfortable and secure environment.