How to Get Rid of Road Paint on Your Car’s Body introduces a comprehensive guide designed to assist car owners in tackling the frustrating issue of road paint splatters. This guide delves into understanding the nature of road paint, the potential damage it can inflict, and the crucial safety measures required before embarking on any removal process.
We will explore a range of solutions, from gentle household remedies for fresh paint to more robust methods for dried-on splatters, ensuring that your car’s finish remains pristine. The aim is to equip you with the knowledge and techniques to effectively restore your vehicle’s appearance, all while safeguarding its delicate paintwork.
Understanding Road Paint on Car Bodies
Road paint, often encountered unexpectedly on our vehicle’s exterior, can be a persistent nuisance. This durable marking material, designed for longevity on roadways, can easily transfer to your car’s paintwork through direct contact, such as driving over freshly painted lines or accidental splashes. Understanding its composition and how it interacts with your car’s finish is the first crucial step in effectively removing it and preventing damage.Road paint is engineered to withstand harsh environmental conditions, heavy traffic, and constant abrasion.
Its formulation prioritizes adhesion and visibility, which unfortunately also means it can strongly bond to your car’s paint if left untreated. This section will delve into the specifics of road paint, its chemical makeup, why it sticks, and the potential harm it can inflict on your car’s pristine finish.
Common Types of Road Paint
Road marking paints are broadly categorized based on their application method, durability requirements, and environmental considerations. The most frequently encountered types on vehicles include thermoplastic and latex-based paints.
- Thermoplastic Paints: These are solid at ambient temperatures and are heated to a molten state for application. They offer excellent durability and reflectivity, often incorporating glass beads for nighttime visibility. They are commonly used for long-life markings on high-traffic roads.
- Latex-Based Paints (Water-Based Paints): These paints utilize a water-based emulsion as the binder. They are easier to clean up and have lower VOC (Volatile Organic Compound) emissions compared to solvent-based paints. While they offer good performance, they may not be as durable as thermoplastic options in extreme conditions.
- Solvent-Based Paints: Less common for road markings due to environmental regulations, these paints use organic solvents as the carrier. They dry quickly and offer good adhesion but can be more aggressive towards vehicle finishes.
Chemical Composition of Typical Road Marking Paints
The composition of road marking paints is a carefully balanced blend of binders, pigments, fillers, and additives, all contributing to their intended performance characteristics. Understanding these components helps in appreciating why they adhere so tenaciously and how they might affect automotive finishes.The primary components typically include:
- Binders: These are the film-forming agents that hold all other components together and provide adhesion to the road surface. Common binders include acrylics, alkyds, epoxies, and vinyl resins for solvent-based paints, and acrylic or styrene-acrylic emulsions for water-based paints. Thermoplastic paints often use hydrocarbon resins or alkyd resins.
- Pigments: These provide color and opacity. Titanium dioxide is a common white pigment for brightness and durability. Other pigments like iron oxides, chromium oxides, and organic pigments are used for colors such as yellow, red, and blue.
- Fillers: Inert materials like calcium carbonate, silica, or barytes are added to increase bulk, improve opacity, and reduce cost.
- Additives: A variety of additives are incorporated to enhance specific properties. These can include plasticizers to improve flexibility, anti-skinning agents, anti-settling agents, UV stabilizers to prevent degradation from sunlight, and rheology modifiers to control application viscosity. For reflective markings, glass beads are a crucial additive, often mixed into the paint or dropped onto the surface during application.
Reasons for Road Paint Adhesion to Car Paint
The strong adherence of road paint to a car’s surface is a consequence of both the paint’s formulation and the nature of automotive finishes. Several factors contribute to this bond.The primary reasons for road paint adhering to car paint include:
- Binder Properties: The binders in road paint are designed to create a strong, durable film that adheres well to asphalt and concrete. These same binders can form a tenacious bond with the clear coat and paint layers of a vehicle, especially when the paint is still wet or semi-cured upon contact.
- Surface Energy: Both road paint and car paint have surface energies that promote adhesion. When the two surfaces come into contact, intermolecular forces, such as van der Waals forces, lead to the paint particles clinging to the car’s finish.
- Curing Process: Road paints, particularly solvent-based ones, cure by evaporation of solvents or by chemical reactions. If contact occurs during this curing phase, the paint can essentially “bake” onto the car’s surface, making removal more challenging.
- Environmental Factors: Heat from the sun can soften both the road paint and the car’s clear coat, increasing the likelihood of a strong bond. Moisture can also play a role, facilitating certain chemical interactions.
- Paint Condition: Older, oxidized, or damaged car paint may have a rougher surface texture, providing more microscopic anchor points for the road paint to adhere to.
Potential Damage to a Car’s Finish
While road paint itself might seem like a mere cosmetic issue, its prolonged presence or aggressive removal can lead to significant damage to your car’s paintwork. The protective clear coat and underlying paint layers are susceptible to etching, scratching, and discoloration.The potential damage that road paint can cause to a car’s finish includes:
- Etching and Dissolving the Clear Coat: Some chemical components within road paint, particularly solvents in certain formulations, can react with the clear coat. This reaction can cause the clear coat to become dull, hazy, or even start to dissolve, compromising its protective function and clarity.
- Surface Scratches: Attempting to remove hardened road paint using abrasive methods, such as scraping with sharp objects or using overly aggressive buffing pads, can easily create deep scratches in the clear coat and paint.
- Discoloration: Certain pigments in road paint, especially vibrant colors, can stain the car’s paint if left in contact for an extended period. This is more likely to occur if the clear coat has been compromised, allowing the pigment to penetrate deeper.
- Paint Delamination: In extreme cases, if the road paint aggressively etches or weakens the car’s clear coat, it could potentially lead to the delamination (peeling or separation) of the paint layers over time, requiring significant repair.
- Loss of Gloss and Shine: Even if the damage is not immediately visible as a scratch or stain, the etching and weakening of the clear coat will result in a duller finish and a significant loss of the car’s original gloss and shine.
Safety Precautions Before Removal
Before embarking on the task of removing road paint from your car’s body, prioritizing safety is paramount. This section will guide you through the essential precautions to ensure a safe and effective removal process, minimizing risks to yourself and your vehicle.Understanding the potential hazards associated with chemicals and the removal process itself is the first step. Adhering to proper safety protocols will not only protect you but also prevent damage to your car’s paintwork.
Essential Personal Protective Equipment (PPE)
When working with chemicals or performing abrasive tasks, appropriate personal protective equipment is non-negotiable. This equipment acts as a barrier between you and potentially harmful substances or physical hazards.To safeguard yourself during the road paint removal process, ensure you have the following essential PPE:
- Safety Goggles or Eye Protection: These are crucial to prevent any splashes of chemicals or flying debris from entering your eyes, which can cause severe injury. Look for goggles that offer a snug fit and good peripheral vision.
- Chemical-Resistant Gloves: Not all gloves are created equal. Opt for gloves made from materials like nitrile or neoprene, which offer excellent protection against a wide range of automotive chemicals. Regular latex gloves may not provide adequate protection.
- Respirator or Face Mask: If you are using chemical removers, especially those with strong fumes, a respirator with appropriate cartridges for organic vapors is highly recommended. At a minimum, a good quality dust mask should be used to prevent inhalation of airborne particles.
- Protective Clothing: Long sleeves, long pants, and closed-toe shoes are important to protect your skin from chemical contact and abrasions. Consider wearing an old work shirt or an apron that can be easily cleaned or discarded.
Importance of a Well-Ventilated Area
Working in an environment with adequate airflow is critical when dealing with chemical paint removers. Poor ventilation can lead to a dangerous buildup of fumes, posing significant health risks.A well-ventilated workspace is essential for several key reasons:
- Minimizing Fume Inhalation: Many automotive paint removers release volatile organic compounds (VOCs) and other fumes. Inhaling these can cause respiratory irritation, headaches, dizziness, and in severe cases, more serious health problems. Good ventilation disperses these fumes, reducing your exposure.
- Preventing Flammability Hazards: Some chemical removers are flammable. In an enclosed space with poor airflow, these flammable vapors can accumulate to a concentration that could ignite from a spark or open flame, leading to a fire or explosion.
- Enhancing Comfort and Safety: Working in a fresh, open environment is simply more comfortable and safer. It allows for better concentration and reduces the risk of heatstroke or discomfort, especially during warmer weather.
Ideally, perform the paint removal outdoors or in a garage with the doors wide open, ensuring a constant flow of fresh air.
Safety Item Checklist
Having a readily accessible checklist of safety items ensures you are prepared for any eventuality during the paint removal process. This proactive approach can prevent minor issues from becoming major problems.Before you begin, review this checklist to ensure you have all necessary safety items on hand:
- Safety goggles or face shield
- Chemical-resistant gloves (nitrile or neoprene)
- Respirator with appropriate cartridges or a high-quality dust mask
- Long-sleeved shirt and long pants
- Closed-toe shoes
- Work rags or old towels for spills
- Bucket of clean water for rinsing
- First-aid kit, including eyewash solution
- Fire extinguisher (rated for chemical fires)
- Adequate lighting for the work area
Risks of Using Harsh Chemicals Without Proper Precautions
The allure of powerful chemical paint removers lies in their ability to quickly break down stubborn paint. However, their effectiveness comes with inherent risks if not handled with extreme care and the right precautions.Using harsh chemicals without adequate safety measures can lead to a cascade of negative consequences:
- Skin and Eye Damage: Direct contact with strong solvents can cause chemical burns, severe irritation, and permanent damage to the skin and eyes. The corrosive nature of some removers means even brief exposure can be detrimental.
- Respiratory Issues: Inhaling the concentrated fumes of aggressive chemicals can lead to acute respiratory distress, coughing, shortness of breath, and long-term lung damage. This is particularly concerning for individuals with pre-existing respiratory conditions.
- Damage to Vehicle Surfaces: Some harsh chemicals, if left on too long or if they are not compatible with your car’s paint or trim, can etch, discolor, or even dissolve the underlying clear coat and paint. This can result in costly repairs.
- Environmental Hazards: Improper disposal of chemical residues can contaminate soil and water, posing a threat to the environment. Always follow local regulations for chemical waste disposal.
“Never underestimate the power of chemicals. Always treat them with respect and prioritize your safety above all else.”
Gentle Removal Methods for Fresh Paint
 - Zanesville Autobody ...")
Discovering fresh road paint on your car’s body can be disheartening, but acting swiftly with the right approach can prevent permanent damage. This section focuses on immediate, gentle removal techniques using common household items, ensuring your car’s finish remains pristine. The key to successfully removing fresh paint is to tackle it before it has a chance to dry and bond with your car’s clear coat.The effectiveness of any cleaning method relies on the paint’s condition and the surface it’s on.
For freshly applied road paint, which is still wet or only partially dried, gentle methods are paramount to avoid scratching or dulling the paintwork. We will explore simple yet effective strategies that prioritize the integrity of your vehicle’s exterior.
Step-by-Step Guide for Removing Fresh Road Paint with Household Items
When faced with fresh road paint, a methodical approach using readily available items can save your car’s finish. The goal is to lift the paint without abrasive action.
- Assess the situation: Gently touch the paint splatter. If it feels wet and pliable, proceed immediately.
- Gather your supplies: You will need clean microfiber cloths, warm water, mild dish soap, and potentially rubbing alcohol (for stubborn spots, to be used cautiously).
- Initial wipe-down: Dampen a clean microfiber cloth with warm water. Gently dab and wipe the wet paint. Avoid scrubbing, as this can smear the paint and spread it further. The aim is to lift the paint off the surface.
- Soapy water application: If plain water is not sufficient, mix a few drops of mild dish soap with warm water. Apply this solution to the affected area with a clean microfiber cloth, dabbing and gently wiping.
- Rubbing alcohol for persistence: For small, stubborn wet paint spots that resist soapy water, a small amount of rubbing alcohol (isopropyl alcohol) can be effective. Apply a small amount to a clean microfiber cloth and gently dab the paint. Immediately follow up with a clean, damp cloth to rinse the area.
Caution
Always test rubbing alcohol on an inconspicuous area first to ensure it does not affect your car’s paint.*
- Rinse and dry: After removing the paint, rinse the area thoroughly with clean water to remove any soap residue or alcohol. Dry the area immediately with a clean, dry microfiber cloth.
Effectiveness Comparison: Warm Water and Soap vs. Rubbing Alcohol for Immediate Removal
Both warm water with mild soap and rubbing alcohol can be effective for removing fresh road paint, but their suitability varies based on the paint’s adherence and the surface’s sensitivity.Warm water and mild dish soap are generally the first line of defense. This combination is excellent for lifting fresh, wet paint because the soap helps to break down the paint’s components, and the water provides lubrication.
It is gentle and less likely to damage the car’s clear coat. This method is ideal for larger splatters or when the paint is very fresh.Rubbing alcohol, on the other hand, is a more potent solvent. It works by dissolving the paint more quickly. While effective for small, more persistent wet spots, it carries a higher risk of dulling or damaging certain car finishes if used excessively or without proper dilution and rinsing.
Therefore, it is best reserved for targeted application on small areas after gentler methods have been tried and found insufficient. It is crucial to always follow up with water and soap to neutralize any residual alcohol.
Technique for Gently Wiping Away Wet Paint Without Smearing
The technique for wiping away wet paint is critical to prevent spreading the mess and creating a larger problem. The principle is to lift, not to rub.
When dealing with wet road paint, adopt a dabbing or blotting motion. Use a clean, soft microfiber cloth. Instead of a back-and-forth scrubbing motion, gently press the damp cloth onto the wet paint and lift. This action pulls the paint onto the cloth. If the paint is still very wet, you may need to use multiple clean sections of the cloth or switch to a fresh cloth frequently to avoid re-depositing the paint onto your car’s surface.
For larger areas, work in small sections, dabbing and lifting systematically. If the paint begins to smear, it indicates you might be applying too much pressure or the paint is starting to set; in such cases, re-wet the area with your chosen cleaning solution and try dabbing again.
Gentle Cleaning Agents Suitable for Recent Paint Splatters
When road paint has just splattered onto your car, selecting the right cleaning agent is crucial to ensure effective removal without harming your vehicle’s paintwork. The following list comprises gentle options that are effective on fresh paint.
- Warm Water: The simplest and often most effective first step. Warm water helps to soften and loosen fresh paint, making it easier to wipe away.
- Mild Dish Soap: When combined with warm water, mild dish soap acts as a surfactant, helping to break down the paint’s oils and pigments. It is pH-neutral and safe for most automotive finishes.
- Car Wash Soap: Specifically formulated car wash soaps are designed to be gentle on car exteriors and are excellent for dissolving and lifting fresh paint splatters.
- Clay Bar (Automotive Grade): While typically used for more embedded contaminants, a lubricant and an automotive-grade clay bar can gently lift fresh paint if used with extreme care and proper lubrication. This is a more advanced option and requires careful technique.
- Dedicated Bug and Tar Remover (Water-Based): Some water-based bug and tar removers are formulated to be gentle enough for fresh paint and can effectively dissolve road paint. Always check the product label for compatibility with your car’s paint.
Effective Solutions for Dried Road Paint

While fresh road paint can often be removed with simpler methods, dried road paint presents a more stubborn challenge. Its hardened nature requires more potent solutions to break down its bond with your car’s paintwork. Fortunately, several effective techniques and products are available to tackle this issue without damaging your vehicle’s finish.This section delves into proven strategies for removing dried road paint, focusing on methods that are both effective and safe for your car’s body.
We will explore solvent-based approaches, commercial removers, and the utility of clay bar treatments, providing practical guidance for each.
Solvent-Based Methods for Breaking Down Dried Road Paint
Dried road paint, being a hardened polymer, often requires a solvent to re-emulsify and loosen its grip on the car’s surface. The key is to use solvents that are strong enough to dissolve the paint but gentle enough not to harm your car’s clear coat or underlying paint. Common and effective solvent-based approaches include the use of specialized automotive degreasers, isopropyl alcohol, and mineral spirits, each with specific application guidelines.
- Specialized Automotive Degreasers: Many automotive detailing brands offer heavy-duty degreasers specifically formulated to break down stubborn contaminants like dried paint. These products often contain a blend of solvents designed for automotive use. Apply the degreaser to a microfiber towel and gently rub the affected area. Allow it to dwell for a short period as per the product’s instructions before wiping away the loosened paint.
- Isopropyl Alcohol (IPA): A common household and automotive cleaning agent, isopropyl alcohol (typically 70% or 90%) can be effective for dried paint spots. It works by slightly softening the paint. Dampen a microfiber cloth with IPA and gently dab or rub the paint spots. For more stubborn spots, you may need to let the IPA sit for a minute or two, but avoid letting it dry completely on the surface.
- Mineral Spirits: This petroleum-based solvent is a more aggressive option and should be used with caution. Mineral spirits are effective at dissolving dried paint. Always test in an inconspicuous area first. Apply a small amount to a microfiber towel and gently rub the road paint. Work in small sections and wipe the area clean with a separate, damp microfiber towel immediately after removing the paint to neutralize the solvent.
Ensure good ventilation when using mineral spirits.
Using Commercial Automotive Paint Removers
Commercial automotive paint removers are specifically engineered to tackle tough paint-related issues, including dried road paint. These products often offer a balance of effectiveness and safety when used according to the manufacturer’s instructions. They are typically formulated to be less aggressive than industrial paint strippers but more potent than general-purpose cleaners.When selecting a commercial paint remover, look for products labeled for automotive use and specifically mentioning the removal of road paint or tar.
Always read and strictly follow the instructions provided on the product label.The general process involves:
- Preparation: Ensure the car’s surface is clean and dry. Park the vehicle in a shaded area to prevent the product from drying too quickly.
- Application: Apply the paint remover to a clean microfiber applicator pad or directly to the dried paint spot, depending on the product’s instructions.
- Dwell Time: Allow the product to sit on the paint for the recommended dwell time. This allows the active ingredients to break down the dried road paint.
- Removal: Gently agitate the area with a clean microfiber towel or applicator pad. You should notice the road paint starting to lift or soften.
- Wipe Down: Wipe away the loosened paint and residue with a clean microfiber towel.
- Cleaning and Protection: Thoroughly wash the treated area with car soap and water to remove any remaining product residue. Apply a coat of wax or sealant to protect the paint.
It is crucial to perform a patch test on an inconspicuous area of your car before applying any commercial remover to the entire affected area. This helps to ensure compatibility with your car’s paint and clear coat.
Clay Bar Treatments for Paint Decontamination
A clay bar treatment is an excellent method for removing embedded contaminants from your car’s paintwork, including stubborn dried road paint. While a clay bar is primarily used for general paint decontamination, it can effectively lift dried paint specks when used in conjunction with a lubricant. The clay bar acts like a very fine abrasive that, when used with a slick surface, glides over the paint and picks up contaminants.The process for using a clay bar for dried road paint involves:
- Washing: Thoroughly wash and dry your car to remove loose dirt and debris. This prevents you from grinding dirt into the paint while claying.
- Lubrication: Spray a generous amount of clay lubricant onto the section of the car you are working on. A dedicated clay lubricant or a mixture of car soap and water can be used. This creates a slick surface for the clay bar to glide on.
- Clay Bar Application: Take a portion of the clay bar and knead it until pliable. Gently glide the clay bar back and forth over the lubricated surface, applying light pressure. You will feel the clay bar start to drag or stick as it picks up the road paint.
- Inspection and Re-kneading: Periodically inspect the clay bar. If it appears dirty or has embedded road paint, fold it over and knead it again to expose a clean surface.
- Working in Sections: Work on small sections of the car at a time, ensuring each section remains lubricated.
- Final Wipe Down: Once you have finished claying the affected area, wipe away any lubricant residue with a clean microfiber towel.
- Post-Claying Care: After claying, it is highly recommended to wash your car again and apply a wax or sealant to protect the paint, as claying can strip existing protection.
A clay bar treatment is a non-abrasive method when used correctly with adequate lubrication, making it a safe option for most automotive finishes.
Comparative Analysis of Different Application Techniques for Dried Paint Removers
When using solvent-based solutions or commercial removers for dried road paint, the application technique significantly impacts effectiveness and safety. Different methods are suited for varying degrees of paint hardening and the size of the affected area.Here’s a comparative analysis of common application techniques:
| Technique | Description | Best For | Pros | Cons |
|---|---|---|---|---|
| Direct Application to Microfiber Towel | Applying the solvent or remover directly onto a microfiber towel, then rubbing the affected area. | Small, isolated dried paint spots. | Good control, minimal overspray, effective for targeted removal. | Can require more manual effort for larger areas. |
| Spray Application (with caution) | Lightly spraying the product onto the paint surface. | Larger areas with multiple dried paint specks. | Quicker coverage for larger areas. | Risk of overspray onto surrounding paint, requires careful masking, potential for product to dry too quickly if not worked on immediately. |
| Dabbing/Patting Method | Dabbing the product onto the paint spot with a clean applicator or towel. | Very small, stubborn dried paint specks that are deeply adhered. | Allows for precise application and longer dwell time on specific spots without spreading. | Can be time-consuming for multiple spots. |
| Soaking a Cloth and Placing on the Spot | Saturating a small piece of cloth with the remover and placing it directly on the dried paint spot for an extended period. | Extremely hardened or large patches of dried paint. | Maximizes contact time and allows the solvent to deeply penetrate and soften the paint. | Requires careful monitoring to prevent damage to the clear coat, potential for streaking if not removed properly. |
It is essential to remember that regardless of the technique, always work in a well-ventilated area, wear appropriate protective gear, and test any product in an inconspicuous area first. The goal is to break down the road paint without compromising the integrity of your car’s finish.
Advanced Removal Techniques and Tools

When gentle methods prove insufficient for stubborn road paint, more advanced techniques and specialized tools can be employed. These approaches require careful application to prevent damage to your vehicle’s paintwork. It’s always advisable to test any new method on an inconspicuous area first.These advanced techniques leverage targeted cleaning agents and controlled mechanical action to break down and lift road paint effectively.
Understanding the proper use of each tool and product is paramount to achieving desired results without compromising your car’s finish.
Pressure Washer Application for Paint Removal
Using a pressure washer can be an effective way to remove road paint, but it must be done with extreme caution. The high-pressure water stream can easily strip your car’s paint if not used correctly. The key is to maintain a safe distance and use the appropriate nozzle setting.Before you begin, ensure you have the correct nozzle for the job.
A wide-angle fan nozzle (40 degrees or wider) is generally recommended, as it disperses the water pressure over a larger area, reducing the risk of damage. Always start with the lowest possible pressure setting and gradually increase it only if necessary. Hold the wand at a consistent distance, typically at least 12-18 inches away from the painted surface. Move the wand in a sweeping motion, never focusing the spray on one spot for too long.
For particularly stubborn paint marks, consider pre-treating the area with a mild degreaser or specialized paint remover to help loosen the adhesion before applying the pressure washer.
Automotive Detail Brushes for Stubborn Spots
For those small, persistent road paint spots that remain after initial cleaning, automotive detail brushes are invaluable. These brushes are designed with soft yet firm bristles that can gently agitate and lift paint without scratching the car’s surface. Their small size allows for precise application and targeted scrubbing.It is important to use brushes specifically designed for automotive detailing. These brushes often feature synthetic or natural bristles that are less likely to cause micro-scratches compared to household brushes.
When using them, apply a suitable cleaning solution (such as a bug and tar remover or a mild soap solution) to the affected area. Gently work the brush in a circular motion or back and forth over the paint spot. Rinse the area thoroughly after each attempt to check your progress and remove any loosened paint residue.
Specialized Automotive Bug and Tar Removers
Specialized automotive bug and tar removers are formulated to break down the adhesives and residues left behind by insects and road tar, which share similar chemical properties with some types of road paint. These products are designed to be safe for automotive clear coats and paints, making them an excellent choice for tackling road paint splatters.These removers typically work by dissolving the paint’s bond with the car’s surface.
Apply the product directly to the road paint spots according to the manufacturer’s instructions. Allow the product to dwell for the recommended time to penetrate and loosen the paint. Then, gently wipe away the softened paint with a clean microfiber cloth. For dried or heavily caked-on paint, a second application or gentle agitation with a detail brush might be necessary.
Always ensure good ventilation when using these products and wear appropriate gloves.
Degreaser Application to Loosen Paint Adhesion
Applying a degreaser is an effective preliminary step to loosen the adhesion of road paint, making subsequent removal easier. Degreasers work by breaking down the oily or sticky components that allow the paint to bond to your car’s surface. This pre-treatment can significantly reduce the effort required for removal, especially for dried or stubborn paint marks.The procedure for applying a degreaser is as follows:
- Preparation: Ensure the affected area is cool to the touch and out of direct sunlight.
- Application: Spray a dedicated automotive degreaser directly onto the road paint spots. Avoid overspray onto other areas of the car if possible.
- Dwell Time: Allow the degreaser to sit on the paint for the time recommended by the manufacturer, typically a few minutes. This allows the chemicals to start breaking down the paint’s adhesion.
- Agitation (Optional): For very stubborn spots, you may gently agitate the area with a soft-bristled automotive brush or a microfiber towel.
- Removal: Wipe away the loosened paint and degreaser residue with a clean, damp microfiber cloth.
- Rinsing: Thoroughly rinse the area with water to remove any remaining degreaser and loosened paint particles.
- Inspection: Inspect the area for any remaining paint. Repeat the process if necessary.
It is crucial to use an automotive-specific degreaser, as household degreasers can be too harsh and damage your car’s paint.
Protecting Your Car’s Paint After Removal
Successfully removing road paint is a significant step towards restoring your car’s pristine appearance. However, the process, especially if it involved stronger solvents or more vigorous scrubbing, can sometimes leave the clear coat slightly dulled or exposed. Therefore, it’s crucial to follow up with protective measures to ensure your car’s paint remains vibrant and shielded from future contaminants. This post-removal care is as important as the removal itself for long-term paint health.The goal of this stage is to not only remove any lingering residue from the cleaning process but also to re-establish a protective barrier on your car’s paintwork.
This barrier will help repel dirt, water, and future road paint splatters, making subsequent cleaning easier and preserving the gloss of your vehicle.
Thorough Car Wash Post-Removal
A comprehensive wash is the essential first step after any road paint removal. This ensures that all cleaning agents, loosened paint particles, and any residual contaminants are completely washed away from the vehicle’s surface. It prepares the paint for further treatment and prevents any abrasive materials from being trapped under protective layers.The washing process should be conducted with care, using a pH-neutral car shampoo and a clean wash mitt or sponge.
Always start from the top of the car and work your way down, rinsing the mitt frequently to avoid spreading dirt. Thoroughly rinse the entire vehicle to remove all soap residue.
Applying Paint Sealant or Wax
Once the car is clean and dry, applying a paint sealant or wax is the next critical step in protecting your vehicle’s finish. These products create a durable layer that shields the clear coat from environmental damage, UV rays, and makes future cleaning significantly easier. Sealants generally offer longer-lasting protection compared to traditional waxes, while waxes often provide a warmer, deeper shine.Before application, ensure your car’s surface is completely dry.
You can apply either a synthetic paint sealant or a natural carnauba wax. Both can be applied by hand or with a machine polisher.
- Preparation: Work in a shaded area to prevent the product from drying too quickly on the surface.
- Application: Apply a small amount of sealant or wax to an applicator pad. Work in small sections, applying in a thin, even layer using overlapping motions (e.g., front-to-back, then side-to-side).
- Curing: Allow the product to haze over according to the manufacturer’s instructions. This curing time is crucial for the product to bond with the paint.
- Buffing: Gently buff off the haze with a clean, soft microfiber towel. Use a separate, clean microfiber towel for a final buff to reveal a high-gloss finish.
Polishing for Shine and Residue Removal
Polishing is an optional but highly recommended step, especially if the paint appears slightly dulled after the paint removal process. Polishing refines the paint surface, removing microscopic imperfections and restoring gloss. It also helps to ensure that no trace residue from the paint removal or protection products remains.The type of polish used will depend on the condition of your paint.
A fine-cut polish is often sufficient to remove light hazing and restore shine, while a more aggressive compound might be needed for deeper imperfections.
- Surface Preparation: Ensure the car is clean and dry. For best results, consider using a clay bar treatment prior to polishing to remove any embedded contaminants that washing alone cannot eliminate.
- Polishing Application: Apply a small amount of polish to a polishing pad. Work on one section at a time, using light to moderate pressure and a consistent motion (e.g., back-and-forth or circular, depending on the polish and pad).
- Wipe Off: After polishing a section, use a clean microfiber towel to gently wipe away the polish residue.
- Inspection: Inspect the polished area under good lighting to ensure a uniform shine and the absence of any streaks or residue.
- Protection: Immediately after polishing, apply a sealant or wax to protect the newly refined paint surface.
“Polishing acts as a micro-level resurfacing, revealing the true depth and clarity of your car’s paintwork.”
Maintaining a Clean Car Exterior
Proactive maintenance is the best defense against future road paint incidents and general wear and tear on your car’s finish. Regular cleaning and protection will keep your car looking its best and make it easier to deal with any new contaminants.Establishing a routine for washing and protecting your car will significantly extend the life and beauty of its paintwork. This also helps in early detection of any potential issues.
- Regular Washing: Wash your car every two to four weeks, or more frequently if exposed to harsh elements like salt, mud, or bird droppings.
- Consistent Protection: Reapply a paint sealant or wax every 3-6 months, or as recommended by the product manufacturer. This ensures the protective layer remains robust.
- Quick Detailing: Keep a quick detailer spray and microfiber towels in your car for immediate touch-ups of light dust or smudges. This prevents minor issues from becoming ingrained.
- Parking Considerations: Whenever possible, park in shaded areas or a garage to minimize exposure to UV rays and environmental contaminants.
- Avoid Automatic Car Washes with Brushes: If possible, opt for touchless automatic washes or hand washing, as abrasive brushes can cause swirl marks and scratches over time.
Common Mistakes to Avoid
When tackling road paint removal from your car, it’s easy to fall into common pitfalls that can lead to more harm than good. Understanding these frequent errors is crucial to protecting your vehicle’s finish and ensuring a successful, damage-free cleaning process. This section will highlight the most prevalent mistakes and their consequences, guiding you toward a safer and more effective approach.One of the most significant errors is the temptation to use overly aggressive or abrasive materials.
While it might seem like a quick fix, these methods can cause irreversible damage to your car’s paint.
Detrimental Effects of Abrasive Materials
Using abrasive materials like steel wool, coarse scrubbing pads, or even certain harsh chemical cleaners can lead to severe scratching and dulling of your car’s clear coat and paint. These materials essentially strip away the protective layers of your paint, leaving it vulnerable to environmental damage, fading, and corrosion. Even if the road paint is removed, the underlying damage can be far more costly and difficult to repair than the original problem.
Risks of Aggressive Scrubbing
Scrubbing too aggressively, even with appropriate cleaning agents, can also inflict damage. The friction generated can wear down the paint, especially in areas where the paint is already thin or has been previously repaired. This can result in a cloudy appearance, swirl marks, or even complete removal of the paint in the affected areas. It’s essential to apply consistent, moderate pressure and allow the cleaning agents time to work.
When to Seek Professional Detailing Services
There are certain situations where attempting DIY road paint removal can be more detrimental than beneficial. If the road paint has been on your car for an extended period and is heavily dried and bonded, or if you are dealing with a classic or high-value vehicle with a delicate paint finish, it is often best to consult a professional detailer.
Professionals have access to specialized tools, high-quality products, and the expertise to assess the paint’s condition and remove the paint safely and effectively without causing damage. They can also provide advice on paint correction and protection after the removal process.
Visualizing the Process: A Step-by-Step Illustration
 | Carnewscast")
Understanding the visual transformation of your car’s paintwork during road paint removal is key to a successful and satisfying outcome. This section will guide you through the distinct stages, from the initial mark to the final protected sheen, highlighting the changes in texture and color that indicate progress and success. By visualizing these steps, you can better anticipate the results and ensure you’re applying the correct techniques.This detailed illustration will focus on the tactile and visual cues at each phase, using a common scenario of white road paint on a dark-colored car as our example.
We will observe how the removal agent interacts with the paint, the physical effort involved, and the ultimate restored appearance of your vehicle’s finish.
Initial Appearance: The Unwanted Mark
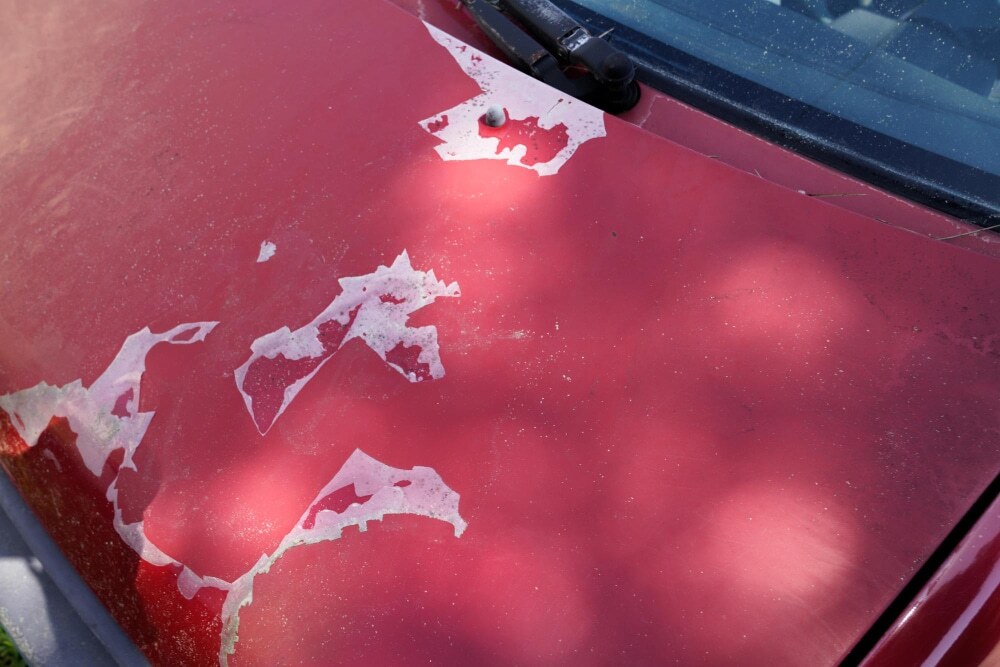
Before any removal efforts begin, the road paint will present a stark contrast against your car’s body. On a dark surface, fresh white road paint will appear as a bright, opaque streak or splatter. Its texture will be slightly raised and may feel gritty or tacky to the touch, depending on how recently it was applied. This is the most visible and often the most alarming stage for car owners.
The paint adheres firmly to the clear coat, obscuring the original shine and color beneath.
During Gentle Removal of Fresh Paint
When dealing with fresh road paint, the initial application of a mild solvent or lubricant (like a clay bar with lubricant) will begin to alter the appearance.
- Visual Change: The opaque white streak will start to break down, appearing less solid and more translucent. You might see faint white smudges transferring onto your microfiber towel or clay bar.
- Texture Change: The initial grittiness will begin to soften. As the paint lifts, the surface will feel smoother under your towel or clay.
- Agent Interaction: The lubricant will create a slick surface, allowing the removal agent to glide. You’ll observe the white paint visibly smearing and lifting with minimal effort.
The motion here is typically a light, back-and-forth or circular wiping action, with gentle pressure. The goal is to coax the paint off without abrading the car’s clear coat. The towel or clay will visibly pick up the white residue, leaving behind a cleaner, albeit potentially still slightly hazed, area.
During Effective Removal of Dried Paint
For dried road paint, the process involves more significant interaction with the removal agent, such as a specialized road paint remover or a stronger solvent.
- Visual Change: The dried paint will initially resist. As the solvent works, you’ll notice the edges of the paint mark softening and becoming less defined. Small flecks of white may start to lift and dissolve, creating a cloudy or streaky appearance in the immediate area of application.
- Texture Change: The hard, brittle texture of the dried paint will gradually become pliable and gummy. When you wipe, you’ll feel the paint starting to give way, rather than resisting.
- Agent Interaction: The solvent will visibly penetrate and break down the dried paint’s structure. You’ll see it bubbling or dissolving, especially if you allow the agent a moment to dwell.
Here, the motion may involve more deliberate wiping or light scrubbing with a soft cloth or sponge. Pressure needs to be applied carefully to ensure the paint is removed without damaging the underlying clear coat. The residue will appear as a more dissolved, paste-like substance, transferring onto the cloth.
After Successful Cleaning and Protection
Once all traces of road paint have been removed, the car’s surface will undergo a final transformation.
- Appearance: The area that was previously marred by road paint will now seamlessly blend with the surrounding paintwork. The original color and gloss will be fully restored, with no visible signs of the incident. The surface will appear smooth and uniform.
- Texture: The paintwork will feel exceptionally smooth to the touch, free from any grittiness or residue. A well-executed removal leaves the clear coat feeling like new.
- Protection: After cleaning, applying a wax or sealant will enhance the shine and provide a protective barrier. This step will deepen the color and add a lustrous, hydrophobic layer, making future cleaning easier and protecting the paint from environmental contaminants. The protected surface will exhibit a noticeable depth of shine and a slick feel.
The final look is one of pristine automotive paint, as if the road paint incident never occurred. The contrast between the original, clean paint and the now-restored section will be imperceptible.
Closure
Successfully removing road paint from your car’s body not only restores its aesthetic appeal but also prevents potential long-term damage to the paint finish. By following the Artikeld steps, employing the right techniques, and taking appropriate precautions, you can confidently tackle this common automotive nuisance. Remember, a little care and the correct approach go a long way in keeping your vehicle looking its best and protecting your investment for years to come.